Solar Panel Removal: The Simple Checklist to Avoid Costly Mistakes
If you’re planning a solar panel removal, you’re at a crucial stage of your solar journey. Whether you’re re-roofing, moving home, upgrading to a new system, or retiring old panels, how you remove them can make the difference between a smooth, low-stress project and a costly disaster. This guide walks you through a simple, practical checklist to avoid expensive mistakes, safety risks, and damage to your roof or electrical system.
Why Solar Panel Removal Needs a Plan (Not Just a Ladder)
Solar systems aren’t like patio furniture you can just unscrew and move. They’re integrated into:
- Your home’s electrical system
- Your roof structure and weatherproofing
- Utility and interconnection agreements
- Warranties and insurance coverage
Unplanned or DIY solar panel removal can lead to:
- Roof leaks and structural damage
- Electric shock or fire hazards
- Voided warranties
- Lost incentives or production credits
- Higher reinstallation or repair costs
A clear checklist protects you from these problems and keeps everyone—homeowners, roofers, and solar contractors—on the same page.
Step 1: Clarify Why You’re Removing Your Solar Panels
Before you touch a single bolt, be clear on your primary reason. This drives every other decision.
Common reasons for solar panel removal:
- Roof replacement or major roof repair
- System upgrade (newer tech, higher efficiency, batteries)
- Home sale or relocation (moving the system to a new property)
- End-of-life system (old, underperforming, or damaged)
- Storm or accident damage (insurance claim situation)
Knowing why helps determine whether your plan should be:
- Temporary removal and reinstallation
- Permanent decommissioning and disposal
- Removal and system relocation
- Partial removal (e.g., some panels for roof work)
Write this down and share it with your solar installer and roofer. Misalignment here is one of the most common and costly mistakes.
Step 2: Review Warranties, Contracts, and Insurance
Before scheduling any work, review three sets of documents:
1. Equipment warranties
- Panel, inverter, and racking warranties often specify that work must be done by qualified or certified technicians.
- Unauthorized solar panel removal can void coverage, leaving you unprotected if something fails later.
2. Original installation contract
- Check for:
- Service terms for removal and reinstallation
- Hourly or flat rates already defined
- Any transfer terms if you’re selling the home
3. Homeowners and roof warranty
- Many roof warranties explicitly require that rooftop solar work be done in a specific way, or by approved contractors.
- Talk to your insurance company if removal is related to storm or fire damage; they may cover some or all of the costs.
Document what’s covered and what isn’t. This alone can save thousands in unexpected expenses.
Step 3: Choose the Right Professional (and Avoid DIY)
It’s tempting to put solar panel removal in the “handyman” category. That’s a mistake. This is a high-voltage, high-elevation job with real hazards.
Who should do the work?
- A licensed solar contractor or
- A roofing company that partners with a solar specialist, or
- An electrical contractor with solar experience
Ask for:
- License number and proof of insurance
- Photos or references from previous solar panel removal jobs
- Clear written scope of work and pricing
- Confirmation they will test and document the system condition pre- and post-removal
Why DIY is risky
- Live DC circuits from panels can still carry dangerous voltage in daylight.
- Incorrect disconnects can damage inverters or other electronics.
- Foot traffic in the wrong places can crack tiles, break shingles, or damage flashing.
- A fall from a roof or ladder is a far more serious—and common—risk than people expect.
Safety and long-term system value almost always justify hiring a professional.
Step 4: Coordinate Timing With Roofing and Other Trades
Poor scheduling is one of the top ways solar panel removal becomes costly.
Align schedules early
If you’re replacing a roof:
- Confirm start and end dates with the roofer.
- Schedule solar removal just before roofing starts.
- Schedule reinstallation after roof inspections and final waterproofing.
This prevents:
- Panels sitting on the ground or in a garage for weeks (risk of damage or theft).
- Roofers working around partially removed systems.
- Extra labor charges for multiple trips.
Also coordinate with:
- Electricians, if service upgrades or main panel work are planned.
- Battery installers, if adding storage at the same time.
The more integrated your planning, the fewer surprise visits and change orders you’ll face.
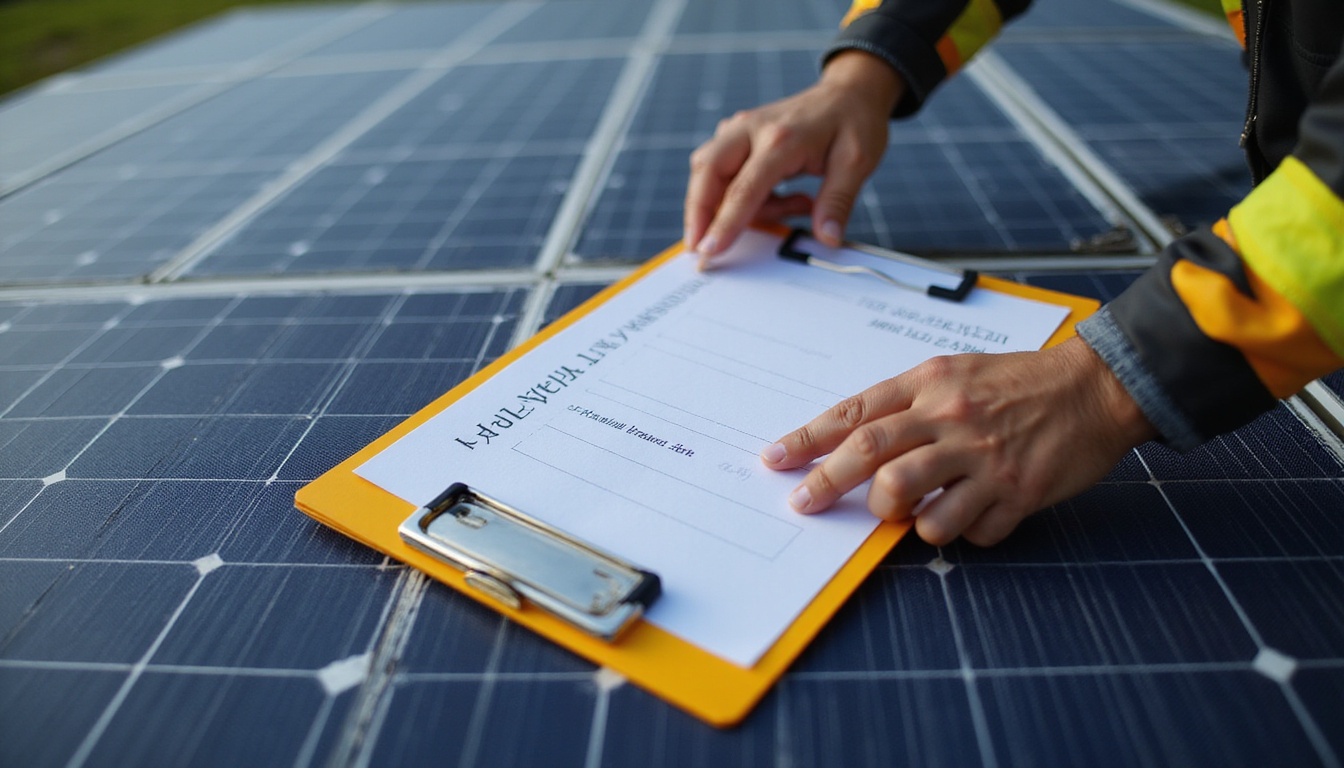
Step 5: Get a Detailed Scope of Work in Writing
Before work begins, your contractor should provide a written scope. This is your roadmap and your protection.
At minimum, it should include:
- Exact number of panels to be removed
- Whether racking, wiring, and conduit will stay or be removed
- Temporary weatherproofing plan for roof penetrations
- Storage location and method for panels and hardware
- How they will label and document wiring for clean reinstallation
- Any system reconfiguration planned (e.g., changing string layouts)
- Disposal or recycling details if components won’t be re-used
Ask: If we decide not to reinstall, what changes in your price and scope? This avoids surprise invoices if your plans shift mid-project.
Step 6: Plan for Safe Electrical Shutdown and Disconnection
Proper electrical shutdown is non-negotiable. Here’s what a competent contractor should handle:
- System shutdown following manufacturer procedures
- Lockout/tagout at:
- Solar breakers in the main panel
- DC disconnects and any combiner boxes
- Verification of zero energy state before physical removal
- Careful disconnection of MC4 or other connectors
- Clearly labeled conductors (string numbers, polarity, etc.)
They should also disconnect or protect:
- Monitoring hardware
- Optimizers or microinverters
- Any communication cables
A rushed electrical disconnection can lead to later troubleshooting costs when reinstalling—and potential safety issues.
Step 7: Protect Your Roof During and After Removal
Roof damage is one of the most expensive consequences of poorly planned solar panel removal.
Your checklist for roof protection:
- Confirm how many penetrations the current system has and where they are.
- Ask who is responsible for temporarily sealing those penetrations if the system won’t be immediately reinstalled.
- Use appropriate flashing, sealant, and underlayment according to roof type (asphalt shingle, tile, metal, etc.).
- Make sure roofing and solar teams agree on:
- Where existing mounts and rails will be removed or reused
- How to handle broken tiles or damaged shingles
- Final aesthetic finish (e.g., replacing old mounts with matched roofing materials)
After removal and roofing work, do a visual inspection from the ground and, if safe, from the attic during a rain event to check for leaks.
Step 8: Handle Storage, Transport, and Panel Condition
Solar panels are durable on a roof—but they’re vulnerable when stacked and moved.
Storage best practices
- Keep panels upright on their edge, not flat, on a stable surface.
- Use padding between panels to protect glass.
- Store in a dry, shaded location away from traffic.
- Keep mounting hardware and fasteners in clearly labeled containers.
Condition documentation
Before and after solar panel removal, ask for:
- Photos or a short video walkthrough of the system
- Notes on any existing cracks, delamination, or corrosion
- Identification of any failed optimizers, inverters, or junction boxes
This helps with warranty claims and avoids finger-pointing later if damage is discovered.
Step 9: Plan for Reinstallation—or Decommissioning
Decide early how the story ends:
If you’re reinstalling
Discuss with your contractor:
- System layout on the new or repaired roof
- Opportunities for upgrades (higher-efficiency panels, better racking, adding battery storage)
- Compliance with current electrical codes—codes evolve, and an older system might need updated wiring or disconnects on reinstallation.
- Updated interconnection paperwork if system capacity changes.
If you’re decommissioning permanently
- Arrange for responsible panel recycling or reuse where possible; some jurisdictions and programs support this (source: EPA – Solar Panel Recycling).
- Ensure all wiring is safely terminated and labeled as de-energized.
- Update your utility and permitting authorities if required.
- Inform your insurance company, especially if your policy noted a solar installation.
A clean, well-documented end-of-life process protects your property and the environment.
Step 10: Understand the Costs of Solar Panel Removal
Costs vary widely, but it helps to understand what drives the price:
- System size (number of panels)
- Roof type and height
- Accessibility (steep slopes, multi-story homes, limited driveway access)
- Whether you’re doing removal only or removal and reinstallation
- Any required electrical upgrades on reinstallation
- Regional labor rates and permit fees
When requesting quotes:
- Ask for a line-item breakdown (removal, storage, reinstallation, disposal).
- Clarify trip charges for multi-visit jobs.
- Check if any portion is covered by insurance (roof or storm damage).
Comparing like-for-like quotes is far easier when the scope is clearly itemized.
Simple Solar Panel Removal Checklist
Use this short checklist as you plan:
- Define your reason for removal (roof, upgrade, move, end-of-life).
- Review equipment, installation, roof, and insurance documents.
- Hire a licensed, insured solar professional—not a generic handyman.
- Align schedules with roofers and other trades.
- Get a written scope of work with all steps and responsibilities.
- Confirm safe electrical shutdown and labeling procedures.
- Agree on a roof protection and temporary sealing plan.
- Plan safe storage and document panel/system condition.
- Decide on reinstallation vs. permanent decommissioning in advance.
- Get detailed, comparable quotes and verify what’s covered by insurance.
Keep a printed or digital version of this checklist and share it with every contractor involved.
FAQ About Removing Solar Panels
How much does solar panel removal and reinstallation cost?
The cost of solar panel removal and reinstallation typically depends on system size, roof complexity, and local labor rates. For many residential systems, homeowners can expect anywhere from several hundred to a few thousand dollars, especially when combined with roof work. Always request itemized quotes so you understand what each part of the job costs.
Can I do my own solar panel removal to save money?
DIY solar panel removal is strongly discouraged. Beyond the fall risk, solar arrays can generate dangerous DC voltage whenever exposed to light, even if you turn off the main power. Incorrectly disconnecting or handling wiring can lead to shock hazards, equipment damage, and voided warranties. A licensed solar or electrical contractor is the safer and often cheaper choice in the long run.
What happens to old solar panels after removal?
When you complete solar panel removal and disposal, panels can be:
- Reused if still functional (for sheds, off-grid cabins, or resale)
- Recycled, where specialized facilities recover glass, metals, and silicon
- Disposed of as waste if no other option is available
Where possible, ask your contractor about recycling programs in your region or check with your local waste authority for guidance, as more recycling solutions are emerging each year.
Take the Next Step: Protect Your Investment During Removal
Your solar system represents a major investment in your home and energy future. Treating solar panel removal as a quick side task is where most homeowners run into trouble—and unexpected expense. With a clear reason, the right professional team, and a simple checklist to guide decisions, you can protect your roof, your equipment, and your long-term savings.
If you’re considering removal for roof work, an upgrade, or a move, now is the ideal time to contact a qualified solar contractor, share this checklist, and get a written plan in place. A few careful steps today can prevent leaks, safety hazards, and thousands of dollars in avoidable costs tomorrow.
Junk Guys Inland Empire
Phone: 909-253-0968
Website: www.junkguysie.com
Email: junkguysie@gmail.com