
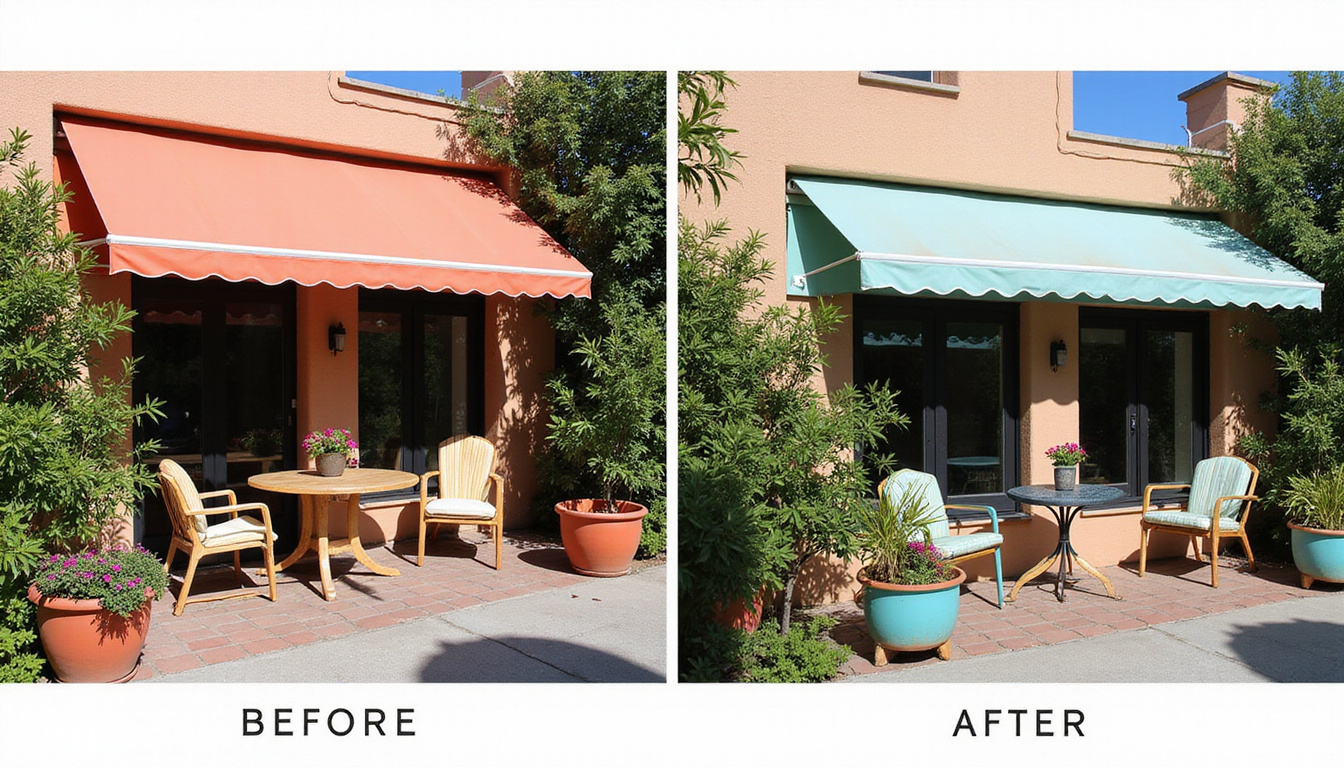
If your old shade structure is faded, sagging, or just doesn’t fit your style anymore, awning removal can instantly transform and modernize your outdoor space. Many homeowners assume they need to hire a contractor for this job, but with basic tools, a little planning, and proper safety precautions, you can often remove a standard patio awning yourself and reclaim your patio in a single weekend.
Below is a practical, step-by-step guide to help you remove fixed and retractable awnings safely and efficiently.
Step 1: Evaluate Your Awning Before You Start
Not every awning is a simple DIY project. Before you grab your ladder, take a few minutes to inspect what you’re dealing with.
Identify the type of awning
Common residential awning types:
- Fixed (stationary) awnings – Permanent frame bolted to the wall or roofline, with fabric or metal panels.
- Retractable manual awnings – Extend and retract with a hand crank; usually wall-mounted.
- Retractable motorized awnings – Operated by switch or remote; include wiring and, sometimes, wind or motion sensors.
- Aluminum or metal awnings – Rigid panels over doors, windows, or patios, often older and heavier.
Knowing which type you have will dictate your awning removal process and safety needs.
Check structural and electrical connections
Look for:
- Where the awning is attached (wall, soffit, roof rafters, fascia)
- Number and spacing of brackets or mounting plates
- Any electrical connections for motorized units or integrated lights
- Signs of damage, rust, or rot in the support area
If you see compromised structure (crumbling masonry, rotted wood, severely rusted brackets) or complex wiring, consider at least consulting a contractor or electrician.
Step 2: Gather the Right Tools and Safety Gear
Having everything ready before you start will save time and prevent unsafe shortcuts.
Basic tools
Most DIYers will need:
- Sturdy step ladder or extension ladder
- Socket set or wrench set
- Screwdrivers (Phillips and flathead)
- Adjustable wrench
- Utility knife or scissors (for fabric or sealant)
- Pry bar (for stubborn fasteners and trim)
- Cordless drill/driver with appropriate bits
Safety gear
At minimum:
- Safety glasses
- Work gloves
- Closed-toe shoes or work boots
- Dust mask (especially for older awnings or drilling into masonry)
- Hard hat if working under heavy sections (highly recommended)
Extra supplies
These will help with cleanup and wall repair:
- Painter’s tape and plastic sheeting (to protect windows/doors)
- Exterior-grade caulk
- Wood filler or masonry patch, depending on wall material
- Touch-up paint and primer
- Trash bags or contractor bags
- A tarp or old blanket to cushion falling parts
Step 3: Safety First – Don’t Skip This
Awnings are often heavier and more awkward than they look. Many DIY accidents happen because people underestimate the weight or work alone.
Follow these key safety precautions:
- Never attempt large awning removal alone. Have at least one strong helper; for wide metal or retractable units, two helpers is even better.
- Work in good weather. Avoid high winds, rain, or slick surfaces.
- Secure your ladders. Place them on firm, level ground. Don’t stand on the top two rungs.
- Shut off power to motorized or lighted awnings at the breaker panel, not just the switch.
- Clear the area. Remove furniture, grills, and decor in the fall zone so you have room to maneuver parts safely.
For more general ladder and fall safety guidance, you can reference recommendations from the U.S. Consumer Product Safety Commission (source: CPSC).
Step 4: Removing a Retractable Awning (Manual or Motorized)
Retractable units are common over patios and decks. Their mounting system is usually straightforward, but the weight and moving parts demand care.
4.1 Prepare the awning
- Fully retract the awning so the fabric and arms are folded in.
- Lock the mechanism if your unit has a lock. If not, secure the arms with bungee cords or straps to prevent accidental extension.
- For motorized awnings, disconnect power:
- Turn off the breaker.
- Locate the junction box or plug.
- Disconnect wiring or unplug and secure cables out of the way.
4.2 Locate and loosen mounting hardware
Most retractable awnings are attached by:
- Wall brackets with bolts/lag screws
- Long mounting rail attached to the wall, with the awning body clipped or bolted to it
Steps:
- Place ladders at both ends of the awning.
- Have your helper support the awning body lightly while you inspect each bracket.
- Loosen, but do not fully remove, the bolts or lag screws from each bracket so the awning can still rest in place while you work across.
4.3 Detach the awning body
- Starting at one end, fully remove bolts from the first bracket while your helper supports that side.
- Move to the opposite end and do the same.
- If there is a center bracket, remove it last, with both of you sharing the weight.
- Carefully lift the awning away from the wall and down to the ground in a controlled motion. Avoid twisting or letting one end drop; that’s where injuries and wall damage happen.
If a mounting rail is left behind:
- Decide if you want to keep it for potential future use or remove the rail by unscrewing it from the wall.
- Use a pry bar gently behind stuck sections; protect the wall surface with a scrap of wood.
Step 5: Removing a Fixed (Stationary) Fabric or Metal Awning
Fixed awnings may be framed in metal or wood, with support posts or side braces. These often come off in smaller pieces.
5.1 Remove fabric or panels
For fabric awnings:
- Look for attachment points: screws, clips, or a track.
- Carefully unscrew or unclip the fabric from the frame.
- Cut caulk or sealant along edges with a utility knife.
- Pull fabric away, folding as you go to control debris and dirt.
For metal/aluminum awnings:
- Identify how the panels are connected to the frame: screws, nails, or crimped seams.
- Starting at one edge, remove fasteners and lift panels off one by one, handing them down to your helper.
5.2 Take down the frame
Common frame components:
- Wall-mounted ledger or header bar
- Side arms or braces
- Front support bar and posts
Remove in this order:
- Support posts first (if present). Have your helper support the front bar as you unscrew or unbolt posts.
- Side braces next. Remove screws or bolts where they meet the wall and frame.
- Wall ledger or header last. Once all projecting parts are off, take down the horizontal piece attached to the house.
If pieces are welded or rusted:
- Use penetrating oil on rusted bolts.
- If you must cut metal, use appropriate tools (like a reciprocating saw with metal blade) and extra PPE, or consider hiring help for that portion.
Step 6: Patching Holes and Repairing the Wall
After awning removal, you’ll likely see a line of holes, discolored paint, or superficial damage where brackets and frames were attached.
6.1 Clean the surface
- Brush away dust and debris.
- Gently scrape off old caulk, sealant, or adhesive.
- Wash the area with mild soap and water; let it dry fully.
6.2 Fill and seal fastener holes
For wood or siding:
- Use exterior-grade wood filler or putty on screw holes.
- Once cured, sand smooth.
- Apply primer and then matching exterior paint.
For brick, block, or stucco:
- Use masonry patch or mortar repair compound.
- Fill each hole, level with a putty knife.
- After curing, you can paint or leave as-is if it blends well.
Around larger openings:
- Seal with exterior caulk to keep water out.
- Pay special attention to penetrations near windows and doors to avoid future leaks.
Step 7: Disposal or Repurposing of Awning Materials
Once the awning is down, decide what to do with the materials.
Reuse or repurpose
- Metal frames can be reused for garden trellises, shade structures, or storage racks.
- Fabric can become drop cloths, covers, or temporary tarps (if still in decent condition).
- Motors and hardware may be sold or donated if functional.
Recycle or dispose
- Many communities accept scrap metal for recycling.
- Check local rules on construction debris and bulk waste pickup.
- Bag small hardware and fabric; bundle large metal pieces for easy handling.
Common Mistakes to Avoid During Awning Removal
To keep your project efficient and safe, steer clear of these frequent errors:
- Working alone on a large awning – increases risk of dropping heavy sections.
- Removing all fasteners at once – the awning can suddenly detach.
- Skipping power shutoff – dangerous with motorized units and integrated lighting.
- Forcing rusted bolts without penetrating oil – may snap hardware or damage the wall.
- Ignoring wall repair – unsealed holes invite water damage, pests, and drafts.
When to Call a Professional Instead
DIY isn’t always the best option. Hire a pro if:
- The awning is very large or high, such as on a second-story balcony.
- There is significant electrical work, especially hard-wired motors or integrated lighting systems you’re not comfortable disconnecting.
- The supporting wall shows structural damage, rot, or loose masonry.
- You lack the tools, helpers, or physical ability to handle heavy sections safely.
A short professional job may cost less than repairing damage from a dropped awning or a fall.
Simple Checklist for DIY Awning Removal
Use this quick checklist on removal day:
- [ ] Identify awning type and mounting points
- [ ] Assemble tools, ladders, and safety gear
- [ ] Turn off power (for motorized units)
- [ ] Clear patio furniture and obstacles
- [ ] Retract and secure awning arms (if retractable)
- [ ] Remove fabric or panels
- [ ] Detach frame or awning body from brackets
- [ ] Lower components carefully with helper(s)
- [ ] Remove remaining hardware and rails
- [ ] Patch holes and seal with caulk or filler
- [ ] Paint or finish repaired areas
- [ ] Recycle, dispose of, or repurpose old materials
FAQ About Awning Removal and Replacement
How much does professional awning removal cost?
Professional awning removal cost varies widely by size, height, and complexity. A simple ground-level patio awning might cost $150–$300 to remove, while large or high-mounted, motorized awnings can run $300–$600 or more. DIY can significantly reduce labor costs if the project is straightforward and you already have the tools.
Can I do awning removal and installation in one day?
If you’re installing a new unit in place of the old one, awning removal and installation can sometimes be done in a single day for standard manual retractable or small fixed awnings. Plan extra time for wall repairs, paint touch-ups, and accurate measurements to ensure new brackets align with solid framing, not just the old holes.
What should I know about retractable awning removal specifically?
For retractable awning removal, the key factors are weight, moving arms, and any electrical components. Always retract and secure the arms, shut off power at the breaker for motorized units, and have enough helpers to manage the long, heavy roller tube and housing while you loosen brackets. Never attempt to open or disassemble the spring-loaded roller mechanism itself unless the manufacturer instructions explicitly guide you to do so.
Reclaiming your patio doesn’t have to require a major renovation. With careful planning, basic tools, and mindful safety practices, awning removal is a manageable DIY project that immediately opens up your outdoor space, boosts natural light, and prepares your home for a fresh new look—whether that’s a modern awning, a pergola, or open sky.
If you’re ready to enjoy a cleaner, brighter patio, start by inspecting your existing awning and gathering the tools you need. Tackle the removal yourself where it’s safe and straightforward, and don’t hesitate to call a professional for anything beyond your comfort level. Take the first step this weekend, and you could be relaxing on a transformed patio by next week.
Junk Guys Inland Empire
Phone: 909-253-0968
Website: www.junkguysie.com
Email: junkguysie@gmail.com