
Home Staging Cleanout: Transform Clutter into Money Boosting Curb Appeal
If you’re getting ready to sell, a strategic home staging cleanout can be one of the highest-ROI steps you take. Buyers decide within seconds whether a property feels like “the one,” and that snap judgment is driven heavily by what they see—and what they don’t see. Decluttering, depersonalizing, and editing what’s in your home can literally turn piles of “stuff” into a faster sale and a higher offer.
This guide walks you through how to tackle a home staging cleanout, room by room, so you boost curb appeal, wow buyers, and maybe even make a little money in the process.
Why a Home Staging Cleanout Matters for Your Bottom Line
A clean, decluttered, well-staged home doesn’t just look better; it usually sells better.
- The National Association of Realtors reports that 58% of buyers’ agents say staging influences most buyers’ view of a home, and 20% of sellers’ agents report a 1–5% increase in sale price for staged homes (source: NAR Profile of Home Staging).
- Staged and well-presented homes often spend less time on the market, which can save you months of mortgage payments, taxes, and utilities.
A focused home staging cleanout does three powerful things:
- Makes spaces look bigger. Removing excess furniture and items opens up sightlines and floor space.
- Helps buyers visualize themselves living there. Fewer personal items mean fewer distractions.
- Signals a well-cared-for property. A clean, organized home implies the systems you can’t see (roof, HVAC, etc.) were also maintained.
Step 1: Mindset Shift – Treat Your House Like a Product
Before you start boxing things up, shift from “this is my home” to “this is a product I’m preparing for market.” That mental reset is the foundation for an effective home staging cleanout.
Ask yourself:
- Will this item help a buyer see the home’s features more clearly?
- Does it contribute to a clean, neutral, spacious feeling?
- If I saw this in a listing photo, would it add value—or visual noise?
If the answer is “no” or “not really,” it probably needs to be packed, stored, donated, sold, or tossed.
Step 2: Plan Your Home Staging Cleanout Like a Project
Rushing usually leads to burnout and half-finished rooms. Instead, create a simple plan:
-
Set a realistic timeline.
- Small condo: 1–2 weekends
- Medium home: 3–4 weekends
- Large or heavily cluttered home: 4–6 weekends or more
-
Prioritize high-impact areas first:
- Curb appeal / exterior
- Entryway
- Living room
- Kitchen
- Primary bedroom
-
Gather supplies in advance:
- Sturdy boxes and plastic bins
- Heavy-duty trash bags
- Labels and markers
- Basic cleaning supplies
- Donation and resale boxes
Treat your home staging cleanout like a short-term business project; the “profit” is your eventual sale price.
Step 3: Use a Simple Sorting System
When you’re working through each room, avoid overthinking every item. Use a fast, repeatable system so you keep moving:
- Keep for showings: Neutral décor, essential furniture, a few tasteful accents.
- Pack for the move: Items you’ll use in your next home, but not before.
- Sell: Things in good condition that might bring in extra cash.
- Donate: Useful items you don’t want to sell.
- Trash / recycle: Broken, stained, outdated, or unusable items.
One Quick Rule
If you wouldn’t be proud to have it appear in a listing photo, it doesn’t belong in the “keep for showings” pile.
Step 4: Curb Appeal – Start the Cleanout Outside
A home staging cleanout starts at the curb, not the living room.
Focus on:
-
Yard and landscaping:
- Mow, edge, and trim shrubs.
- Remove toys, garden clutter, dead plants, and empty pots.
- Coil hoses neatly or store them away.
-
Porch and entry:
- Remove excess furniture or décor; keep it simple and tidy.
- Replace worn-out mats and dated wreaths.
- Clean porch lights, door hardware, and any visible cobwebs.
-
Driveway and walkways:
- Clear oil stains if possible.
- Remove extra cars from the driveway on showing days.
- Move trash and recycling bins out of sight.
Your goal: a clean, inviting, low-clutter exterior that hints at a well-maintained interior.
Step 5: Entryway and Hallways – Create an Immediate “Ahh” Moment
The entry sets the tone for every showing.
- Remove piles of shoes, coats, and bags.
- Limit to one or two neutral pieces of art or a mirror.
- Use a small console table only if it doesn’t crowd the walkway.
- Empty and organize any visible shelves or cubbies.
Hallways should be clear, bright, and open. Take down family photo galleries and replace with one or two neutral pieces, or leave the walls bare if they’re in good shape.
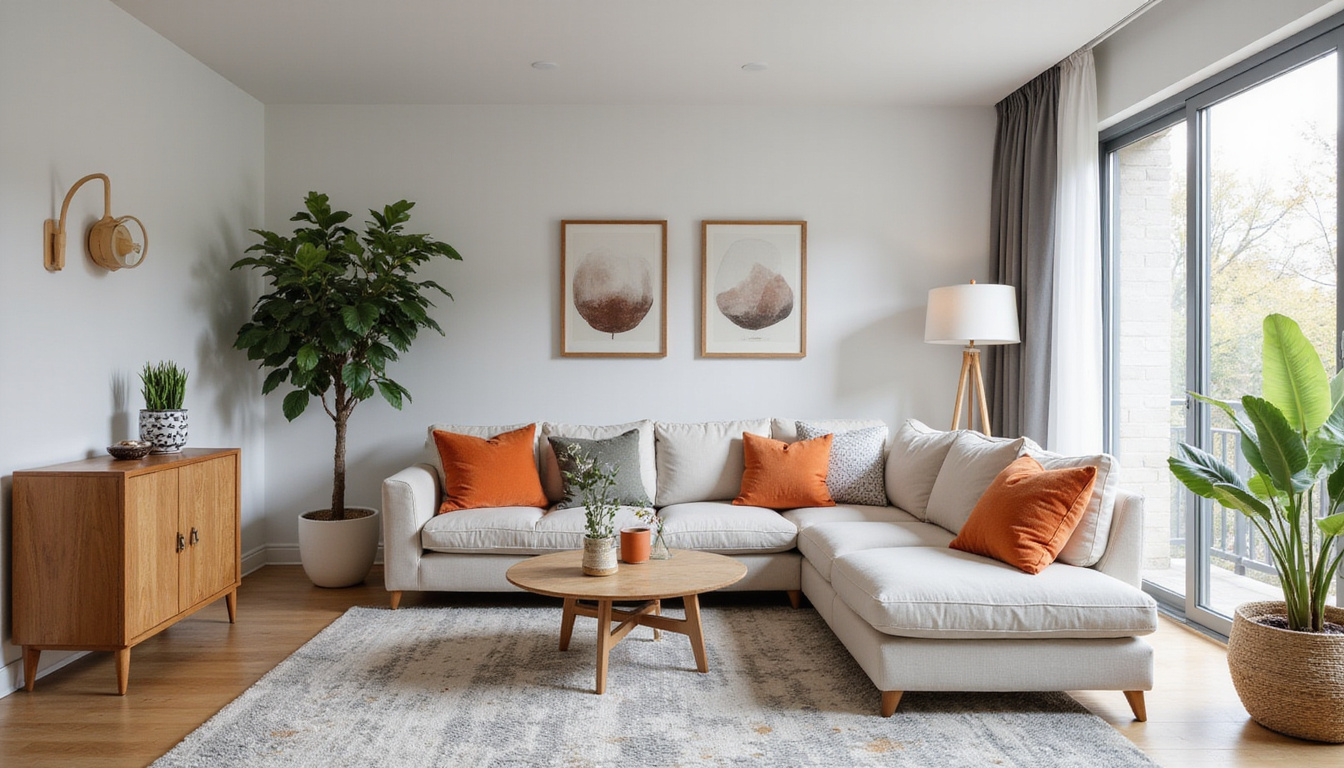
Step 6: Living Room – From Lived-In to Showcase
The living room is where buyers imagine relaxing and entertaining. A home staging cleanout here has outsized impact.
Focus on:
-
Furniture:
- Remove extra chairs, side tables, and bulky pieces.
- Create clear walkways with obvious focal points (fireplace, view, or TV wall).
-
Surfaces:
- Clear coffee tables; leave 1–3 decorative items max (tray, book, small plant).
- Minimize items on media consoles.
-
Décor:
- Take down busy or controversial art.
- Remove heavy drapes if they block light; opt for simple, light-colored window treatments.
- Eliminate collections, trophies, and themed décor.
The living room should feel calm, spacious, and light-filled rather than packed with personality.
Step 7: Kitchen – Declutter to Highlight Space and Function
Kitchens sell homes. A thorough kitchen-focused home staging cleanout can significantly change buyer perception.
-
Counters:
- Remove most appliances; keep only one or two (e.g., coffee maker, attractive mixer).
- Store dish racks, knife blocks, and utensil crocks.
- Clear fridge magnets, photos, and notes.
-
Cabinets and pantry:
- Aim for 25–50% empty space on shelves to suggest abundant storage.
- Toss expired food and unused gadgets.
- Line up remaining items neatly; consider matching storage containers for visual appeal.
-
Under the sink:
- Clear out excess cleaners and old supplies.
- Wipe down surfaces to show this often-checked area is clean and dry.
Buyers will open doors and drawers. A tidy, edited kitchen suggests a home that’s easy to live in and maintain.
Step 8: Bedrooms – Calm, Neutral, and Clutter-Free
In bedrooms, the home staging cleanout is about creating a restful, hotel-like feel.
-
Closets:
- Remove at least 30–40% of clothing.
- Use matching hangers where possible.
- Keep floors clear and organize shelves.
-
Surfaces:
- Clear nightstands except for 1–2 items (lamp + small décor).
- Remove personal medications, chargers, and stacks of books.
-
Décor and linens:
- Use neutral bedding in solid or simple patterns.
- Take down posters, sports flags, and themed décor in kids’ rooms.
- Remove most personal photos.
Aim for an impression of space and serenity rather than specific personalities.
Step 9: Bathrooms – Hotel-Level Clean and Minimal
A bathroom’s visual cleanliness can make or break buyer confidence.
- Clear counters of everything except hand soap and maybe one small plant or décor item.
- Put away toothbrushes, razors, personal care items, and cleaning products.
- Edit the shower: 1–2 matching bottles at most; remove loofahs and clutter.
- Minimize visible textiles: fresh, neutral towels only; replace worn rugs or remove them for photos.
If your bathroom can pass for a hotel or spa snapshot, your home staging cleanout is on point.
Step 10: Basements, Garages, and Storage – Show Capacity, Not Chaos
These spaces often become dumping grounds, but they’re huge selling points if they look organized.
-
Garage:
- Remove or store excess tools, sports gear, and boxes.
- Use shelves or wall hooks to get items off the floor.
- If possible, leave enough open space to clearly park a car.
-
Basement:
- Group stored items in labeled bins.
- Avoid tall, unstable stacks of boxes.
- Clear pathways and highlight usable square footage.
-
Attic and closets:
- Edit aggressively to avoid an “overstuffed” impression.
- Show that there’s room to grow into the home’s storage.
Buyers care less about what you keep and more about how well the space can handle their things.
Turn Clutter into Cash: Selling Items from Your Cleanout
A smart home staging cleanout can actually put money in your pocket before you sell.
Consider:
- Listing furniture and décor you’re not taking with you on local marketplaces.
- Selling higher-value items (antiques, designer pieces, collectibles) through consignment shops or specialty sites.
- Hosting a garage sale to quickly move lower-value items.
Use any money earned to offset moving costs or to fund small, high-impact upgrades (fresh paint, new light fixtures, upgraded cabinet hardware).
Common Mistakes to Avoid During a Home Staging Cleanout
As you streamline your home, watch out for these pitfalls:
- Going too far and making spaces feel sterile. Leave a few warm touches like plants, throw pillows, and artwork.
- Stuffing everything into one “off-limits” room. Buyers still want to see that space, and it can send the wrong message.
- Ignoring smells. Deep clean, air out, and neutralize pet, smoke, or cooking odors.
- Leaving valuable or sensitive items out. Secure important documents, jewelry, medications, and electronics.
A balanced approach leads to a home that’s both inviting and move-in ready.
Quick Home Staging Cleanout Checklist
Use this list as a fast reference while you work:
- Curb appeal: yard tidied, porch cleared, entry refreshed
- Entryway: shoes, coats, and clutter removed
- Living areas: extra furniture and décor edited out
- Kitchen counters: mostly clear, fridge front emptied
- Cabinets and closets: 30–50% of items removed or packed
- Bedrooms: neutral bedding, minimal personal photos
- Bathrooms: hotel-level minimalism and cleanliness
- Basement/garage: organized, clear walkways, labeled storage
- Personal/valuable items: secured or removed before showings
- Final pass: lights on, blinds open, surfaces wiped before each showing
FAQ: Home Staging Cleanout and Decluttering for Sale
1. How far in advance should I start a home staging cleanout before listing?
Ideally, begin your home staging cleanout 4–6 weeks before listing. This gives you time to declutter thoroughly, deep clean, and make minor repairs without feeling rushed. Even starting 2 weeks ahead can make a meaningful difference in how your home presents in photos and in person.
2. Do I really need a professional organizer for home staging decluttering?
Not necessarily. Many sellers handle their own home staging decluttering using a room-by-room plan and a simple sorting system. However, if you’re overwhelmed by the volume of items or have time constraints, hiring a professional organizer or staging company can speed up the process and ensure your efforts align with what appeals most to buyers.
3. What should I prioritize if I’m short on time for a home preparation cleanout?
When time is tight, focus on the highest-impact areas for a home preparation cleanout: curb appeal, entryway, living room, kitchen, primary bedroom, and main bathroom. Clear surfaces, remove obvious clutter, and ensure these spaces feel bright and spacious. Then, tackle closets and storage as time allows.
Ready to Turn Your Cleanout into Curb Appeal—and Profit?
A thoughtful home staging cleanout is one of the most cost-effective ways to influence buyers, boost curb appeal, and potentially increase your sale price. By stripping away visual noise, highlighting your home’s best features, and presenting a clean, neutral, move-in-ready space, you set yourself up for stronger offers and a smoother sale.
If you’re preparing to list, pick a starting room this week, map out your cleanout plan, and begin transforming clutter into an asset. Every box you pack and every surface you clear is one step closer to a faster, more profitable sale.
Junk Guys Inland Empire
Phone: 909-253-0968
Website: www.junkguysie.com
Email: junkguysie@gmail.com