
Updating an outdated or broken ceiling light is one of the fastest ways to refresh your space—and you can often do it in an afternoon. With the right approach, light fixture removal is straightforward, safe, and budget‑friendly, whether you’re swapping in a modern pendant or prepping for recessed lights.
This guide walks you step‑by‑step through removing old fixtures, avoiding common hazards, and getting your room ready for a stylish new look.
Before you start: safety and prep
Electrical work always deserves respect. Even a simple light fixture removal means you’re dealing with wiring, junction boxes, and potentially old or damaged components.
Tools and materials you’ll want on hand
Having everything ready will make the job smoother and safer:
- Voltage tester (non-contact recommended)
- Screwdrivers (flathead and Phillips)
- Step ladder or stable platform
- Wire cutters/strippers
- Wire connectors (wire nuts)
- Electrical tape
- Flashlight or work light
- Drop cloth or old sheet
- Painter’s tape (optional, for labeling wires)
- Safety glasses and dust mask (especially for older homes)
Turn off the power properly
Don’t rely on just flipping the light switch.
- Go to your main electrical panel.
- Switch off the breaker labeled for that room or fixture.
- Return to the room and try turning the light on—it should stay off.
- Use a voltage tester at the fixture wires to verify there is no power present before touching anything.
The U.S. Occupational Safety and Health Administration (OSHA) emphasizes testing circuits even after switching off breakers as a best practice for electrical safety (source: OSHA Electrical Safety).
Step-by-step light fixture removal for ceilings
Most standard ceiling fixtures—flush mounts, semi‑flush mounts, and basic domes—follow a similar removal process.
1. Clear the area and protect surfaces
Lay down a drop cloth under the fixture to catch dust, screws, and glass pieces. Move furniture if needed so you can position a ladder safely and reach the fixture comfortably.
2. Remove bulbs and decorative parts
Start by taking out:
- Light bulbs
- Decorative shades or glass domes
- Trim rings or decorative covers
Often, glass domes twist off or are held by small thumbscrews around the fixture. Keep all small parts in a container so they don’t roll away.
3. Expose the mounting hardware
With the decorative pieces removed, you’ll see:
- A metal base or canopy against the ceiling
- Screws at the sides or center holding it to the junction box or mounting strap
Unscrew these while supporting the fixture with your free hand. Many fixtures will drop slightly on a hinge or hang from a hook, exposing the wiring behind.
4. Identify and label the wires
Once the electrical box is visible, you’ll typically see:
- Black (or red) wire – hot
- White wire – neutral
- Bare copper or green wire – ground
Before disconnecting anything:
- Use your voltage tester again as a final safety check.
- Use painter’s tape to label wires if anything looks unusual (e.g., multiple cables, different colors, or splices). Labeling helps you (or an electrician) later during installation.
5. Disconnect the wiring safely
Most fixtures will be connected with wire nuts and sometimes electrical tape.
- Unscrew the wire nuts, one connection at a time.
- Gently separate the fixture wires from the house wires.
- Cap any exposed house wires temporarily with fresh wire nuts for safety.
- Unscrew any ground wire from the metal box or mounting strap if attached.
Once all wires are safely disconnected, you can fully remove the fixture base.
Handling common fixture types
Light fixture removal varies a bit depending on what you’re taking down. Here’s how to handle the most common styles.
Removing flush-mount and dome fixtures
These are usually the easiest:
- Remove the glass dome or cover.
- Unscrew the mounting screws exposed under the dome.
- Lower the fixture base and follow the wiring steps above.
Watch for springs or clips that may hold the glass in place. Don’t force them—if it’s not budging, check for hidden screws or knobs.
Taking down pendant lights
Pendant fixtures hang from a canopy at the ceiling:
- Remove any shades and bulbs first.
- Unscrew the canopy cover at the ceiling to expose the junction box.
- Support the pendant while disconnecting the wires.
- If the chain or rod is adjustable, you may find extra wire coiled inside the canopy; be prepared for that when lowering it.
Removing track lighting
Track lighting involves a track plus multiple heads:
- Turn off power at the breaker.
- Remove each head by twisting or unlocking it from the track according to manufacturer instructions.
- Unscrew the track from the ceiling or wall.
- Remove the power feed box or canopy where the track connects to the house wiring.
- Disconnect the wiring as with any other fixture.
Older homes and special situations
Homes built decades ago can present extra challenges during light fixture removal.
Knob-and-tube or cloth-covered wiring
If you remove a fixture and see:
- Porcelain knobs and tubes
- Brittle cloth-wrapped wires
- No ground wire
Pause and consider calling a licensed electrician. These systems can be fragile and may not meet current code, and improper handling can be hazardous.
No junction box
Sometimes a fixture is mounted directly to the ceiling material without a proper metal or plastic electrical box behind it. That’s not code-compliant in most areas.
If you encounter:
- Wires coming straight through a hole in the drywall or plaster
- No visible box when the fixture base is removed
Plan to have an electrician install a proper junction box before you add a new fixture.
Crumbling plaster or damaged ceiling
Removing an old, heavy fixture can expose:
- Cracks in plaster
- Loose drywall
- Oversized holes around the box
Before installing your new light, patch and reinforce the area so it can safely support the fixture. Use patching compound or a ceiling repair kit, and consider a larger canopy if you need to cover cosmetic flaws.
Dealing with heavy chandeliers and ceiling fans
Light fixture removal becomes more complex with heavier items like large chandeliers or ceiling fans.
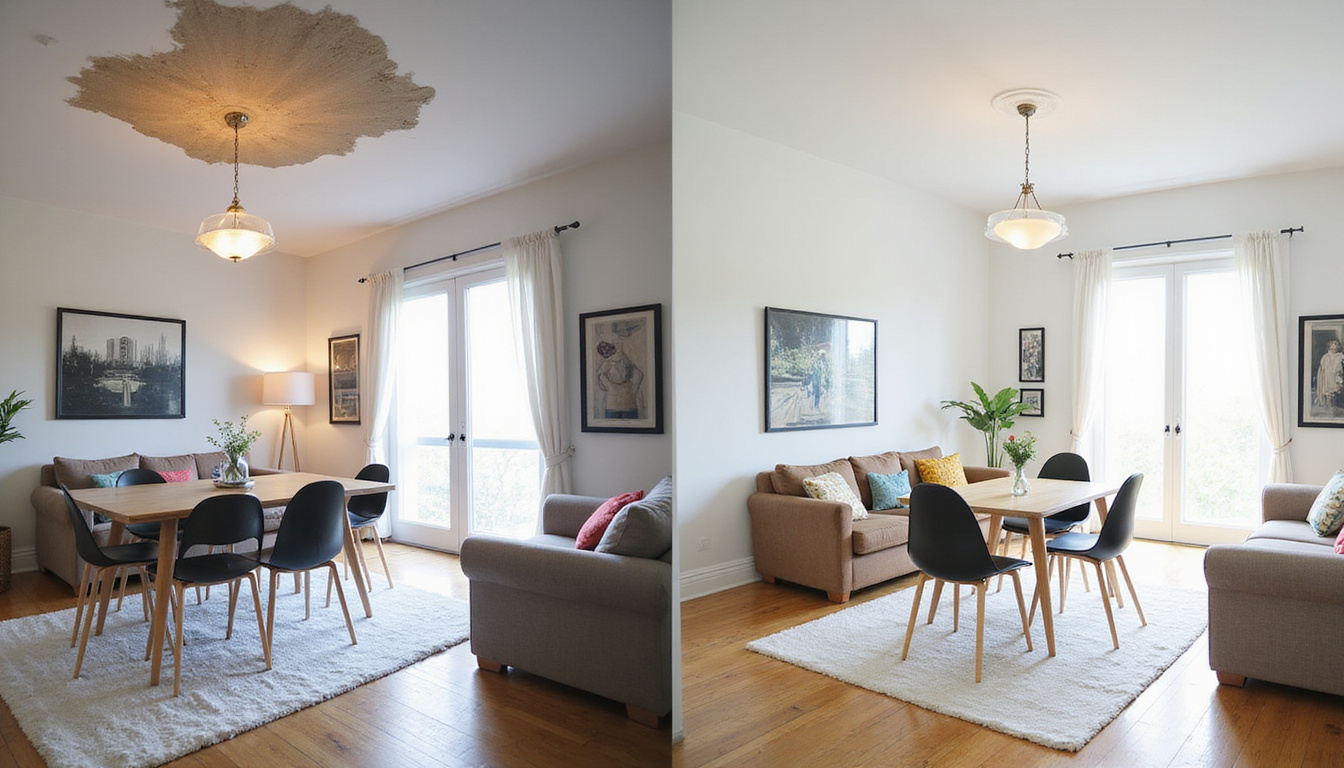
When removing a chandelier
- Have a helper to support the weight.
- Work in stages: remove crystals, shades, and bulbs first to reduce weight and risk.
- Use a temporary support hook or 2×4 across the ladder tops to hold the fixture while you disconnect wires.
- Verify that the ceiling box is rated for heavy fixtures before installing a replacement; you may need an upgraded, fan‑brace style box.
Taking down a ceiling fan
Fans are heavier and often awkward:
- Turn off power at the breaker.
- Remove blades first to reduce size and weight.
- Take off the light kit (if attached), then the canopy.
- Many fans have a hinged bracket that lets the motor hang while you disconnect wires—use this if present.
- Once wiring is disconnected, lift the fan off the mounting bracket.
If any part feels unstable or too heavy to manage alone, bring in a second pair of hands.
What to do after successful light fixture removal
Once the old fixture is gone, you have a few options depending on your plans.
Installing a new fixture
Before adding your new light:
- Confirm the box is securely fastened and properly rated.
- Ensure you have a ground wire available.
- Check that wire insulation is intact and not brittle or cracked.
If everything looks sound and local codes allow homeowners to do minor work, you can follow the manufacturer’s instructions to install your new fixture. Otherwise, prepare the space and have an electrician complete the final connection.
Temporarily capping the box
If you’re not ready to install a new light right away:
- Make sure all house wires are capped with wire nuts.
- Gently fold wires back into the box.
- Install a blank cover plate rated for ceiling use to safely close the opening.
Never leave exposed wiring or open junction boxes.
Patching and painting
If you’re relocating the fixture or switching to recessed lighting:
- Remove the old box if it’s no longer needed (power must be properly re‑routed by a pro).
- Patch the hole with drywall or plaster repair materials.
- Sand, prime, and paint to match the ceiling.
Common mistakes to avoid during light fixture removal
To keep your project smooth and safe, steer clear of these frequent errors:
- Skipping the breaker: Only turning off the switch can leave the circuit live.
- Not testing for voltage: Always confirm wires are de‑energized before touching.
- Letting the fixture hang by the wires: This can damage connections and insulation.
- Mixing up wires: Label if needed, especially where multiple cables meet.
- Forcing stuck parts: Look for hidden screws or clips instead of pulling harder.
- Ignoring signs of damage: Burn marks, melted insulation, or brittle wires warrant professional help.
Quick-reference checklist for light fixture removal
Use this simple list as a guide:
- Turn off power at the breaker.
- Confirm power is off with a voltage tester.
- Protect floor and furniture with a drop cloth.
- Remove bulbs and decorative elements.
- Support the fixture while loosening mounting screws.
- Expose and identify all wires.
- Disconnect ground, neutral, and hot wires (one connection at a time).
- Cap exposed house wires with wire nuts.
- Inspect the box and wiring for damage.
- Prepare for new installation or cover/patch the opening.
FAQ: light fixture removal and replacement
Q1: Can I do light fixture removal myself, or do I need an electrician?
If you’re dealing with a basic fixture, have a properly functioning breaker panel, and feel comfortable following safety steps, many homeowners handle simple light fixture removal on their own. However, call a licensed electrician if you see old or damaged wiring, no junction box, moisture issues, or aren’t confident working with electrical components.
Q2: Is it dangerous to remove a ceiling light without turning off the breaker?
Yes. Relying only on the wall switch while performing ceiling light removal is risky, because the switch might not fully de‑energize all wires in the box. Always shut off power at the breaker and test for voltage before touching any wiring.
Q3: How long does it usually take to remove and replace a light fixture?
For a standard, easily accessible room light, ceiling light fixture removal and replacement can often be completed in 30–60 minutes. More complex fixtures—like heavy chandeliers, ceiling fans, or track lighting—can take longer, especially if you need ceiling repairs or box upgrades.
Updating your lighting doesn’t have to mean a major remodel. With careful planning and safe, step‑by‑step light fixture removal, you can retire dated fixtures, uncover wiring issues before they become problems, and set the stage for brighter, more stylish rooms. If any part of the process feels uncertain—especially when it comes to wiring age, box strength, or fixture weight—bring in a licensed electrician to finish the job with confidence. Ready to refresh your space? Start by choosing the room that bothers you most, follow this guide for safe removal, and then install a new fixture that finally matches your style and the way you live.
Junk Guys Inland Empire
Phone: 909-253-0968
Website: www.junkguysie.com
Email: junkguysie@gmail.com