
Mulch can be a garden’s best friend—until it isn’t. Whether it’s broken down into slimy chips, harboring pests, or piled too high around your plants, there comes a time when mulch removal is the smartest move you can make for your yard’s health and appearance. The good news: with the right strategy, tools, and timing, you can strip old mulch quickly and efficiently, just like the pros.
This guide walks you through step-by-step DIY methods, professional tricks, and when it makes sense to hire help, so your cleanup is fast, safe, and effective.
Why mulch removal matters more than you think
Mulch is not meant to last forever. Over time, it breaks down, compacts, and can actually harm your landscape if it isn’t occasionally removed.
Key reasons to prioritize mulch removal:
- Prevent over-mulching: Repeatedly adding new mulch on top of old can lead to “mulch volcanoes” around trees, suffocating roots and inviting rot.
- Reduce pests and disease: Old, damp mulch can harbor fungi, mold, termites, ants, and other insects.
- Improve soil health: Decomposed mulch can form a dense mat that blocks water and air from reaching plant roots.
- Refresh your landscape’s look: A clean slate makes fresh mulch or alternative groundcovers look dramatically better.
Many experts recommend stripping or at least thinning mulch every few years instead of just topping it off indefinitely (source: University of Massachusetts Extension).
Step 1: Decide if you need partial or full mulch removal
Before you start, assess your mulch beds. The right approach depends on what you see and feel.
Signs you need full removal:
- Mulch is slimy, moldy, or has a strong sour smell.
- Depth is more than 3–4 inches, especially around trees and shrubs.
- Lots of weeds are growing through it anyway.
- You see signs of termites or heavy insect activity.
- Color is mostly gray and material is breaking down into fine dust or mat-like layers.
Signs you might do partial removal (thinning):
- Mulch looks mostly healthy but is slightly too deep.
- You just want to refresh appearance and add a thin new layer.
- It’s only been 1–2 years since your last full cleanup.
If in doubt, lean toward more thorough mulch removal. It creates a cleaner base for whatever you want to do next—new mulch, rock, groundcovers, or a planting redesign.
Step 2: Gather the right tools for fast, efficient mulch removal
The right tools are the difference between an all-day struggle and a fast, tidy cleanup. Here’s what DIYers and pros rely on:
- Leaf rake (flexible tines): For gathering loose mulch into piles without digging too deep.
- Hard rake or bow rake: For breaking up compacted or matted mulch and pulling it away from plants.
- Flat shovel or grain scoop: For scooping up piles into wheelbarrows or bags quickly.
- Pitchfork (manure or mulch fork): Excellent for chunky wood mulch; it lets soil fall through.
- Wheelbarrow or garden cart: To move mulch off-site or to a compost area.
- Tarps: To stage mulch for hauling or keep it off grass and hardscapes.
- Gloves and knee pads: Protection and comfort, especially for larger areas.
- Contractor bags or bulk bags: For disposal if you’re not composting.
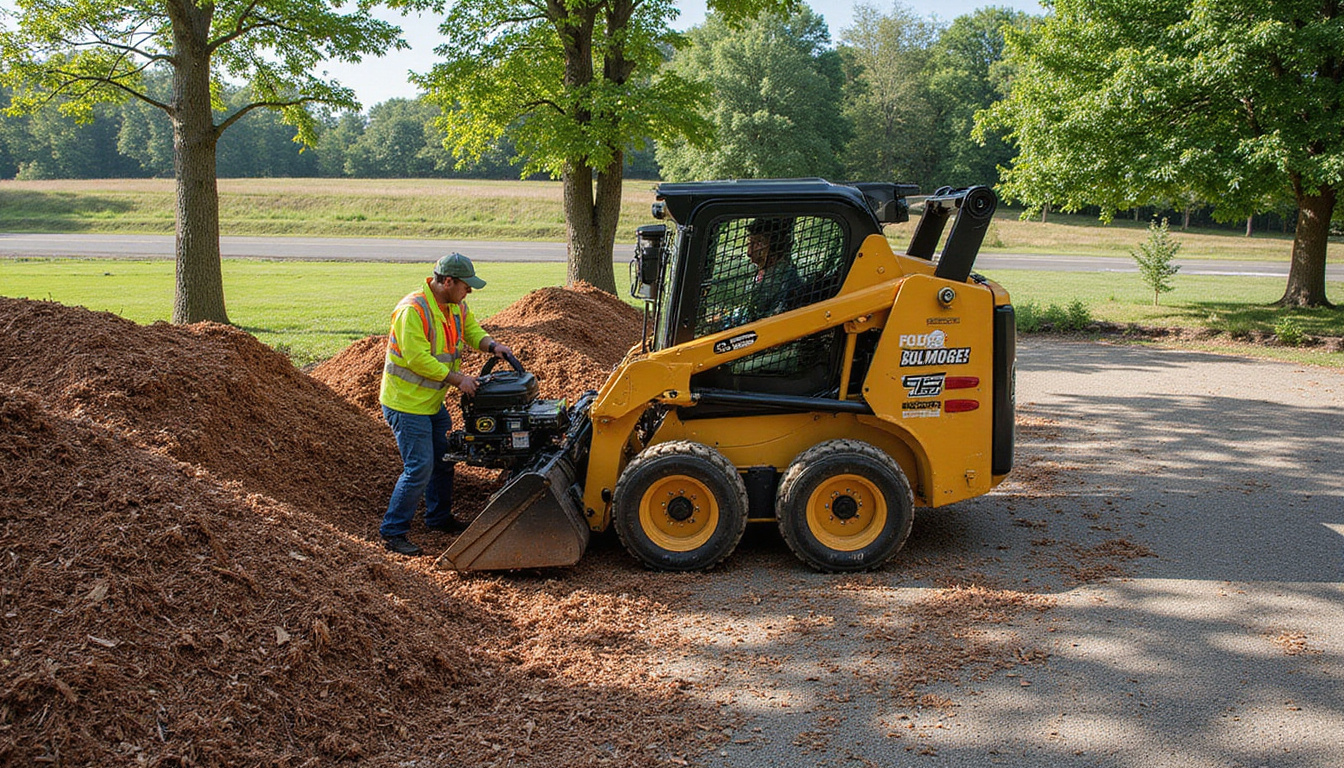
Pros often use power tools for large jobs—like skid steers with grapple buckets or powered wheelbarrows—but most residential mulch removal tasks can be managed with simple, affordable hand tools.
Step 3: Prepare your beds before you start pulling mulch
A few minutes of prep can prevent plant damage and make the job smoother:
-
Water lightly the day before
Slightly moist mulch is easier to rake and scoop than bone-dry or soggy material. Avoid soaking—it adds needless weight. -
Mark delicate plants and irrigation heads
Use flags or stakes to mark small perennials, drip irrigation emitters, and sprinkler heads so you don’t rake or shovel into them. -
Prune low branches if needed
If shrubs hang low over mulch beds, trim back a little so you can rake underneath safely. -
Plan your exit route
Decide where the old mulch is going: compost pile, green waste bin, truck bed, or bulk bags. Lay down tarps if you’ll be staging material.
Step 4: DIY mulch removal techniques (step-by-step)
Here’s a simple process that mirrors how professionals tackle old mulch.
1. Start at the edges
Use a leaf rake or your hands to:
- Pull mulch away from lawn edges, sidewalks, and borders.
- Create small piles 2–3 feet inside the edge of the bed.
This keeps debris from spilling into the grass or onto hardscapes.
2. Work in zones, not the whole bed at once
Divide the area mentally into manageable sections. For each zone:
- Break up compacted mulch with a hard rake.
- Rake into rows or piles running parallel to your exit path.
- Scoop or fork into wheelbarrow using a flat shovel or pitchfork.
This systematic approach prevents you from moving the same mulch twice.
3. Clear around plants and tree trunks carefully
Around trunks and stems:
- Switch to hand tools or gloved hands.
- Remove all mulch that touches bark.
- Aim to leave a visible “mulch-free” ring 3–6 inches from tree trunks and shrub crowns.
This helps prevent rot, pests, and girdling roots associated with over-mulching.
4. Level and inspect the soil surface
Once most mulch is gone:
- Use a leaf rake to gently smooth the soil.
- Pull out any remaining chips or clumps.
- Check for exposed roots; plan to cover those later with a thin, appropriate layer.
At this point, you’ve done the core of the mulch removal work. What comes next depends on how you want to reuse or dispose of the old material.
Step 5: What to do with removed mulch
One of the biggest questions after mulch removal is: keep it, compost it, or toss it?
Reuse it (if it’s still in decent shape)
You can often repurpose older but still-healthy mulch:
- As a base layer under fresh mulch further from plant crowns.
- On pathways or behind sheds where appearance matters less.
- In erosion-prone areas as a temporary barrier.
Avoid reusing mulch that’s infested with pests, heavily diseased, or smells sour.
Compost it for future soil improvement
If the mulch is largely wood-based and not contaminated:
- Add it to a hot compost pile mixed with green materials (grass clippings, kitchen scraps).
- Turn regularly to help large pieces break down faster.
- Use the finished compost in beds and vegetable gardens later.
Shredding or chopping larger pieces first will speed decomposition.
Dispose of it properly
Sometimes tossing is the best move, especially if:
- You’ve had fungus issues (e.g., artillery fungus, slime molds).
- There are signs of termites or carpenter ants.
- The mulch is contaminated with chemicals or road debris.
Check local rules—many municipalities accept yard waste separately and may even compost it at a regional facility.
Pro tips for faster, cleaner mulch removal
Landscape pros rely on a few consistent tricks to keep jobs efficient:
- Use tarps as “sleds”: Rake mulch directly onto a tarp, then drag the tarp to your disposal or staging area.
- Work downhill if possible: Let gravity help you move loads rather than pushing uphill.
- Upgrade to a mulch fork: For chunky wood chips, a pitchfork is faster and lighter than a shovel.
- Stack tasks: One person rakes, another shovels, a third wheels—assembly-line style.
- Avoid very wet days: Waterlogged mulch is heavy, messy, and harder to handle.
If you’re doing a whole yard, even renting a powered wheelbarrow or mini skid steer for a day can dramatically cut labor time and strain.
When to hire a professional mulch removal service
Sometimes, DIY isn’t the best or safest option. Consider hiring pros if:
- You have large areas or deep, long-established mulch beds.
- Access is difficult (steep slopes, tight side yards, many steps).
- You suspect termite activity or other serious pest issues.
- Heavy equipment is needed, or you have limited time or physical ability.
- You have trees that have been over-mulched (“volcanoes”) for years and may need expert root and trunk assessment.
A professional landscaping or junk removal company can:
- Strip, haul, and legally dispose of large volumes of mulch quickly.
- Provide recommendations on whether to replace with new mulch, stone, or alternative groundcover.
- Spot and address issues like poor grading, improper tree planting depth, or chronic drainage problems revealed during removal.
When comparing quotes, ask how they handle disposal, whether they protect surrounding turf and hardscapes, and if they’ll leave beds prepped for new mulch or planting.
How often should you remove old mulch?
There’s no one-size-fits-all schedule, but a general guideline is:
- Light refresh each year: Rake, thin if needed, and top up only to reach 2–3 inches total.
- Full mulch removal every 3–5 years: Strip most or all mulch, inspect soil and plants, then apply a fresh, properly measured layer.
Pay special attention around:
- Young trees and shrubs (to avoid burying the root flare).
- House foundations (don’t create moisture traps against siding).
- Vegetable beds (where disease pressure can build quickly if old mulch sits too long).
Common mistakes to avoid during mulch removal
Even a simple job can go sideways with a few missteps. Watch out for these:
- Digging too deep: Don’t remove topsoil along with the mulch. Keep your tools skimming the surface.
- Leaving mulch in contact with bark: This invites rot and pests around trees and shrubs.
- Ignoring weed roots: When the mulch is off, take a moment to pull or dig out persistent weed roots.
- Skipping protective gear: Old mulch can hide nails, glass, or splinters—sturdy gloves and closed-toe shoes are important.
- Dumping mulch on the lawn: Piles left on grass for more than a day can smother and kill turf.
Quick checklist for efficient mulch removal
Use this simple list to plan and execute your project:
- Inspect beds and decide: full or partial mulch removal?
- Gather tools: rakes, shovel/fork, wheelbarrow, tarps, bags, gloves.
- Lightly water the day before (if conditions are dry).
- Mark plants, irrigation, and obstacles.
- Start at edges; rake mulch into piles or onto tarps.
- Scoop or fork mulch into cart, bags, or truck.
- Clear carefully around trunks and plant crowns.
- Smooth and inspect soil surface; pull weeds.
- Reuse, compost, or dispose of old mulch appropriately.
- Plan next steps: fresh mulch, rock, or new planting.
FAQ: Mulch removal and replacement
Q1: Do I really need to remove old mulch before adding new mulch?
Not every time, but periodic old mulch removal is smart. If your existing layer is already 2–3 inches deep, slimy, or matted, stripping it prevents buildup that can suffocate roots and harbor pests. If it’s thin and in good shape, you can often just fluff it and add a light top-up.
Q2: What’s the best way to remove landscape mulch without damaging plants?
The best approach to removing mulch from flower beds is to work in two stages: use a leaf rake to pull most mulch away from plants, then switch to hand removal or a hand cultivator close to stems and trunks. Always maintain a mulch-free ring around plant bases and avoid deep digging that might disturb roots.
Q3: Can I leave old mulch in place and just turn it into the soil?
In small areas, gently mixing a thin layer of decomposed mulch into the top couple of inches of soil can improve structure and organic matter. But for heavy, wood-based mulch, full removal of landscape mulch is better—large chips can tie up nitrogen as they break down. It’s usually best to remove, compost separately, then return as finished compost later.
Refreshing your beds with proper mulch removal is one of the fastest ways to improve curb appeal and plant health at the same time. With a clear plan, a few basic tools, and the techniques outlined here, you can tackle old, tired mulch confidently—whether you go the DIY route or bring in a pro crew for heavy lifting.
If your beds are overdue for a reset, schedule a weekend, gather your tools, and start with one manageable area. Once you see the clean soil, healthier plant bases, and the transformation that fresh mulch or new groundcover can bring, you’ll be glad you made mulch removal part of your regular landscape routine.
Junk Guys Inland Empire
Phone: 909-253-0968
Website: www.junkguysie.com
Email: junkguysie@gmail.com