
Tackling stucco removal on your own can look like an easy way to save thousands of dollars—until a hidden crack, damaged wire, or structural issue turns “weekend project” into a full-blown renovation disaster. Whether you’re stripping old exterior stucco to update your siding or removing interior textured walls for a smoother, modern finish, avoiding common DIY mistakes is critical to protecting your home, your budget, and your safety.
This guide explains what homeowners most often get wrong with stucco removal, what to do instead, and when it’s smarter to call in a pro.
Understanding What Stucco Removal Really Involves
Before picking up a hammer or renting a demolition saw, it’s important to understand what stucco is and how it’s attached to your home.
What is stucco made of?
Traditional stucco is a cement-based mixture of:
- Portland cement
- Sand
- Water
- Sometimes lime and additives
It’s hard, dense, and heavy. Modern systems may be:
- Three-coat stucco over metal lath and building paper
- One-coat stucco over foam insulation boards
- EIFS (Exterior Insulation and Finish System) – a synthetic stucco over foam
Each type behaves differently during stucco removal and carries different risks of damaging the underlying structure.
What’s behind the stucco?
Behind that stucco layer you may find:
- Sheathing (plywood, OSB, or older plank boards)
- Weather-resistive barrier (housewrap, building paper)
- Insulation
- Electrical wiring, plumbing, vents, and sometimes gas lines
- Structural framing
The biggest DIY mistake is treating stucco like simple plaster or paint. Removing it without a plan for what lies beneath is how people end up with severed wires, punctured pipes, and compromised walls.
Mistake #1: Underestimating the Mess, Weight, and Labor
Many homeowners begin stucco removal after watching a quick video and assuming, “How hard can it be?”
In reality, stucco is:
- Extremely heavy – a single square foot can weigh several pounds
- Dusty – silica dust from cement is hazardous to breathe
- Physically demanding – especially for exterior walls and ceilings
What can go wrong
- Overexertion and injury: Strains, sprains, and falls from ladders or scaffolding
- Inadequate dust control: Silica dust contaminating the home, harming lungs
- Waste disposal surprises: Not planning for multiple trips to the dump or the cost of debris bins
How to avoid it
-
Accurately estimate scope and time.
Measure square footage and research realistic removal rates per hour for a novice, not a pro. -
Plan debris handling in advance.
- Rent an appropriate-sized dumpster
- Use strong contractor bags for smaller projects
- Check local disposal rules for construction waste
-
Use proper PPE and dust control.
At minimum:- NIOSH-approved respirator for silica dust (not just a cloth mask)
- Safety goggles
- Ear protection
- Gloves and long sleeves
The physical and logistical realities of stucco removal are often reason enough for homeowners to at least get a quote from a professional for comparison.
Mistake #2: Ignoring Asbestos and Lead Risks
Older homes can hide serious health hazards in textured finishes and exterior claddings.
Where asbestos and lead can appear
- Popcorn/texture ceilings and walls (often mistaken for simple “stucco”)
- Joint compounds and older plasters
- Paint layers under or over interior stucco
If your house was built before the 1980s, you should assume there might be asbestos or lead until testing proves otherwise. Disturbing these materials during stucco removal can release toxic dust into your living space.
How to avoid a dangerous mistake
-
Test before you scrape or demo.
Send small samples of suspect material to a certified lab or hire an environmental testing company. The U.S. EPA recommends testing for asbestos before disturbing suspect materials in older homes (source: EPA). -
Follow regulations.
If asbestos or lead is present, removal may be legally restricted to licensed abatement contractors in your area.
Skipping this step to “save money” can result in major health risks and costly remediation later on.
Mistake #3: Using the Wrong Tools or Too Much Force
When it comes to stucco removal, more power is not always better. The goal is to break the stucco free while preserving what’s behind it as much as possible.
Common DIY tool mistakes
- Using a heavy sledgehammer on exterior walls, cracking interior finishes or windows
- Running a demolition saw too deep and cutting into sheathing, wiring, or pipes
- Using a pressure washer at excessively high PSI, driving water into the wall cavity
- Attacking interior textured “stucco” with metal scrapers without softening it first, gouging drywall
Smarter tool choices
The best tool set depends on the type of stucco and where it is:
For exterior cement stucco:
- Rotary hammer with chisel bit
- Cold chisels and a 2–3 lb hammer
- Oscillating multi-tool for careful cutting near edges
- Masonry saw with depth control for scoring, not full-depth cuts
For interior textured ceilings/walls:
- Pump sprayer with water (or specialty texture remover)
- Wide drywall knives or broad knives
- Pole sander or sanding screens with dust extraction
Always start in a small, inconspicuous test area to see how the stucco responds to your method before committing to a full-wall approach.
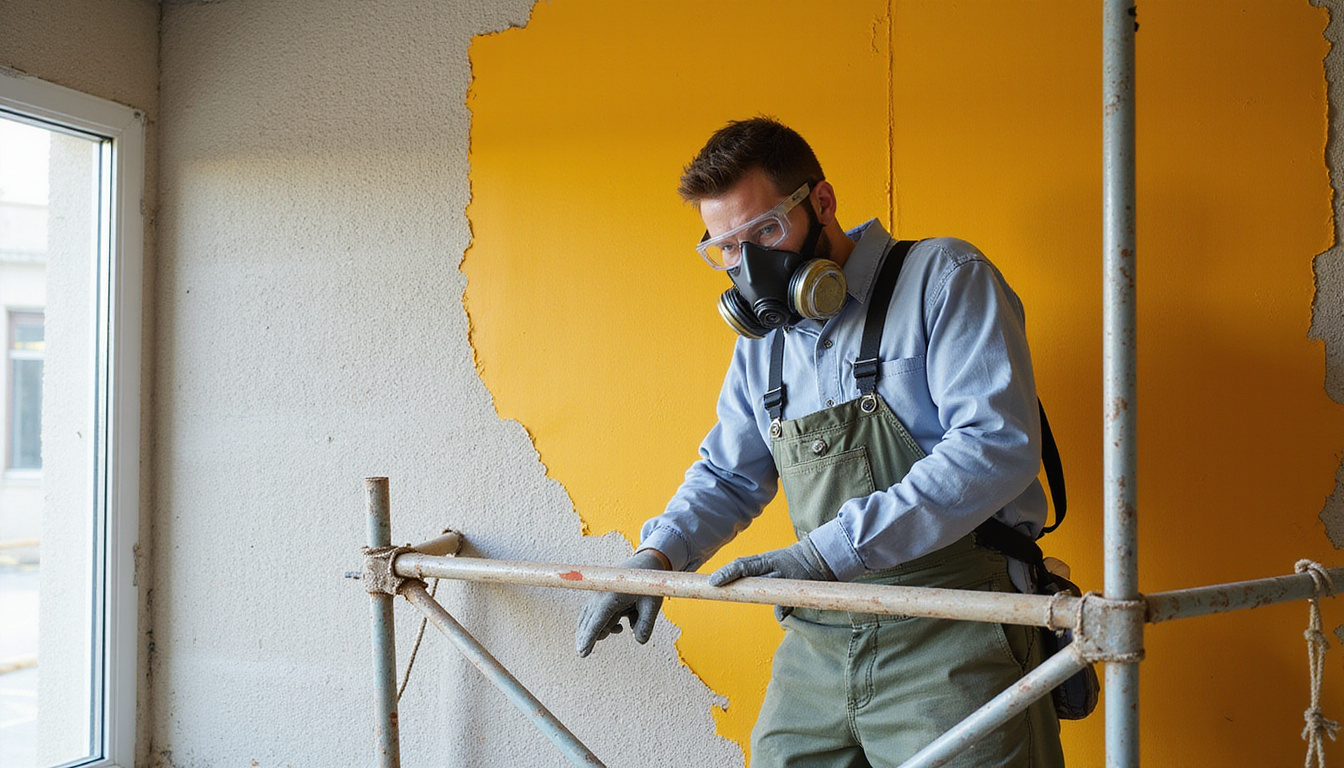
Mistake #4: Damaging the Weather Barrier and Sheathing
On exteriors, the layers behind the stucco are your home’s primary defense against water intrusion. A rushed stucco removal can easily turn into a hidden moisture problem.
What often gets damaged
- Housewrap or building paper
- Flashings around doors, windows, and roof intersections
- Sheathing panels, especially if already water-damaged
If you rip or puncture these elements and don’t repair them properly, new cladding installed over the damage can trap water and lead to rot, mold, and structural issues.
How to minimize damage
-
Work in sections.
Remove stucco in controlled, smaller areas so you can keep track of damage as you go. -
Identify and protect flashings.
Slow down around windows, doors, and roof lines. Cutting or prying too aggressively here is a top cause of leaks later. -
Plan for repairs.
Realistically, you should expect some sheathing and weather-barrier repair or replacement as part of exterior stucco removal. Budget for materials and time, not just the demolition.
If you’re unsure what a properly flashed and waterproofed assembly looks like, this is a strong indicator that professional help would be a safer choice.
Mistake #5: Neglecting Structural and Moisture Issues
Many homeowners decide on stucco removal after spotting cracks, bulging areas, or stains. These are sometimes cosmetic—but they can also signal deeper failures.
Problems that may be hiding behind stucco
- Rotting sheathing and framing from long-term water intrusion
- Termite or pest damage
- Rusted metal lath and fasteners
- Degraded insulation and mold growth
Simply tearing off the stucco and putting on new siding, without diagnosing the root cause, can leave serious issues unresolved.
What to do instead
-
Inspect as you remove.
Each time you open a wall section, check:- Wood for softness or discoloration
- Mold odors or visible growth
- Rusted nails, lath, or corroded metal framing connectors
-
Document findings.
Take photos of any damage; they can be invaluable if you later need to consult a contractor, engineer, or insurance company. -
Pause for professional evaluation when needed.
If you discover significant rot, sagging, or widespread moisture damage, it’s worth calling a contractor or structural engineer to advise on repairs before continuing.
Mistake #6: Not Coordinating Stucco Removal with Replacement Plans
Stucco removal is just the first step; what you do after demolition matters just as much. A common DIY problem is starting removal without a clear plan—or budget—for what comes next.
Key questions to answer before starting
- What will replace the stucco? (New stucco, fiber-cement siding, brick veneer, etc.)
- Are the existing wall assemblies suitable for the new cladding system?
- Will windows/doors need new flashing or trim details?
- Do local codes require specific weather barriers, insulation levels, or fire ratings?
Why this matters
Different cladding systems have different:
- Thicknesses and weight
- Installation methods and fastener requirements
- Drainage and ventilation needs
If you remove stucco only to find your sheathing is out of plane, or the framing requires modification for the new siding, you can be forced into unplanned and expensive scope changes.
Lining up materials, permits (if needed), and a clear sequence of work before you start stucco removal prevents open walls sitting exposed to the weather and costs spiraling out of control.
Mistake #7: Skipping Permits and Code Requirements
Some jurisdictions consider major exterior cladding changes—like full stucco removal and replacement—as work that requires a permit.
Risks of ignoring permits
- Fines and stop-work orders
- Trouble when selling the home (unpermitted work issues)
- Insurance complications if failures or damage occur later
How to handle it correctly
- Call your local building department and briefly describe the project. Ask:
- “Does full stucco removal and replacement require a permit?”
- “Are there specific energy or moisture-control requirements I need to follow?”
Following code isn’t just about paperwork; it’s about meeting minimum standards for durability, fire resistance, and energy performance.
A Practical Step-by-Step Overview for Safer DIY Stucco Removal
If, after weighing the risks, you still decide to tackle part or all of the work yourself, use a structured approach:
-
Assessment & Testing
- Determine stucco type (traditional, one-coat, EIFS, interior texture)
- Test for asbestos/lead if the home is older
-
Planning
- Confirm permits and code requirements
- Plan debris disposal and protection of landscaping/interiors
-
Protection & Setup
- Install plastic sheeting and dust barriers
- Wear proper PPE
- Set up ladders/scaffolding safely
-
Test Area Removal
- Start with one small area to verify tools and technique
- Check what’s behind the stucco and adjust your plan
-
Systematic Removal
- Work in manageable sections
- Be extra careful near openings and penetrations
-
Inspection & Repairs
- Inspect exposed sheathing, framing, and insulation
- Repair or replace damaged materials and weather barriers
-
Transition to Replacement
- Ensure walls are dry, flat, and structurally sound
- Install new cladding per manufacturer specs and local code
This approach won’t eliminate all challenges, but it greatly reduces the odds of costly surprises.
FAQs About Stucco Removal and Replacement
Q1: Is DIY stucco removal worth it, or should I hire a stucco removal contractor?
DIY stucco removal can save on labor, but it’s only worth it if you’re prepared for heavy work, have proper safety gear, and understand the risks to underlying structures. For multi-story homes, large projects, or houses with known moisture problems, hiring an experienced stucco removal contractor is usually safer and more cost-effective in the long run.
Q2: How much does stucco removal and siding replacement typically cost?
Costs vary widely by region, height of the home, and extent of damage. Full exterior stucco removal with new siding can range from several thousand dollars on a small single-story house to tens of thousands on a large or complex structure. DIY removal can reduce labor costs, but you’ll still pay for disposal, repairs, and the new cladding system.
Q3: Can I remove interior stucco or textured walls myself without damaging the drywall?
Yes, interior stucco removal is often manageable for homeowners if the texture is mainly joint compound on modern drywall. The key is to test first, use water or a texture remover to soften the material, and scrape gently with broad knives. Avoid over-saturating the wall and be prepared for some patching and skim-coating afterward.
Ready to Move Forward with Stucco Removal?
Stucco removal is one of those projects that looks simple from the outside but can expose hidden problems, health hazards, and structural issues once you begin. By understanding the common DIY mistakes—underestimating the work, ignoring asbestos and lead, using the wrong tools, damaging weather barriers, overlooking structural problems, neglecting planning, and skipping permits—you can make a far more informed decision.
If you’re still confident and prepared, use the guidelines above to plan your project step by step, prioritize safety, and build in time for proper repairs. If the risks feel overwhelming, reach out to qualified stucco removal and siding professionals for estimates and advice. A short consultation now can prevent a long list of expensive corrections later.
Whether you decide on a targeted DIY approach or full professional help, the best time to start planning your stucco removal is before cracks spread, moisture damage worsens, or energy bills climb higher. Take the next step today: assess your home’s exterior, gather a few quotes, and choose the path that protects both your property and your budget.
Junk Guys Inland Empire
Phone: 909-253-0968
Website: www.junkguysie.com
Email: junkguysie@gmail.com